Advanced Setup
Install, configure, and deploy the agent.
Note:
Our intent is to support all maintained versions of the respective libraries. If library maintainers drop support for a version of their library we may also drop support.
Supported Frameworks
Skylight has built in integration for Rails, Sinatra, and Grape. We also offer alpha support for Phoenix!
Rails
Minimum: 4.2+
Skylight utilizes Rails’ Railties to autoload. It then watches the built ActiveSupport::Notifications to get information about controller actions, database queries, view rendering, and more.
Sinatra
Minimum: 1.4+
Not running Rails? We also support Sinatra apps, though the default instrumentation will be less detailed. By default, we’ll recognize your Sinatra routes and also instrument any supported gems. You can also add custom instrumentation).
Grape
Minimum: 0.13+
We support Grape standalone as well as embedded in Rails and Sinatra. We recognize endpoints and instrument rendering and filters.
Phoenix (Alpha)
While we still love Ruby, we know that a number of users have been exploring Phoenix as an alternative to Ruby and Rails. To that end we’ve been working on a version of the Skylight agent for Phoenix. You can find that on GitHub right now. It should work, though it’s definitely in an early state.
In order to create a Phoenix app in Skylight, you’ll need to create a new Skylight app manually. In Ruby apps, you can run bundle exec skylight setup but there’s no Phoenix equivalent yet. After enabling this feature, when you go to the Setup screen you can manually create a new app to connect to your Phoenix agent.
If you give the Phoenix agent a try, we’d love to hear how that goes. We’re pretty excited about it!
Requirements
Ruby Version
Minimum: 2.3
While the minimum version listed above is based on our most recent version of the Skylight agent, older versions of the agent support previous Ruby versions. Refer to the below table for Ruby version requirements for each major Skylight release:
| Skylight Version | Ruby Version |
|---|---|
| 5.x | >= 2.6 |
| 4.x | >= 2.3 |
| 3.x | >= 2.2.7 |
| 2.x | >= 2.2.7 |
| 1.7 | >= 1.9.3 |
You can also check the required Ruby version based on the specific version of the Skylight agent you are running. For the curious, our CI currently is testing against these versions. Intermediate versions are expected to work as well.
Server Requirements
We aim to support all *nix servers with glibc 2.23+ as well as musl. Just add the gem to your Gemfile, add the configuration, then deploy as you normally would. You can also run the agent locally on macOS for testing, if desired.
(NOTE: Skylight v4 supports glibc 2.15+.)
The agent runs great on Heroku. No special actions required.
Installing the Agent
-
Visit the Skylight app to get your setup token.
- Add Skylight to all environments in your Gemfile.
 # Gemfile
 gem "skylight"
- Run the following commands in your development environment:
 # Shell
 bundle install
 bundle exec skylight setup <setup token>
This will automatically generate your
config/skylight.ymlfile. - Deploy your application to production.
IMPORTANT:
The contents of the skylight.yml file should be considered secret, so if your application is open source, you will not want to commit it to your repo. See Setting Authentication Tokens to learn how to set an environment variable instead.
See the information about individual installations below to find out how to run the agent in the environments you care about.
Deploying the Agent
Once you’ve run skylight setup you’ll need to get the configuration to your server. For this you have two options:
-
Check in the
config/skylight.ymlfile (which is automatically generated and includes the necessary auth token) OR -
Set the appropriate ENV vars, at the minimum
SKYLIGHT_AUTHENTICATION. See below for more information.
After this, all you need to do is run your standard deployment process.
Heroku
As an alternative to using the config/skylight.yml file, you can set the authentication token as an ENV variable in your Heroku configuration:
heroku config:set SKYLIGHT_AUTHENTICATION="<token>"
Note that changing a config var in Heroku will cause your application to restart. Once the app has restarted and handled several requests, you should begin seeing performance data about your application in Skylight.
For more information about setting Heroku config vars, see Configuration and Config Vars in the Heroku documentation.
Agent Configuration
The automatically generated configuration file config/skylight.yml looks like this:
# config/skylight.yml

---
# The authentication token for the application.
authentication: <authentication token>
The only thing you need to set is the authentication token, but there are a number of other configuration options available.
Setting Configuration Variables
Add additional configuration options to config/skylight.yml. This configuration file will be parsed as ERB so you can add additional logic if desired.
Alternatively, configuration can be set via environment variables. In general, the ENV variables are capitalized versions of the YAML versions prefixed with SKYLIGHT_.
See also: Environment-Specific Configuration
General Options
Setting Authentication Tokens
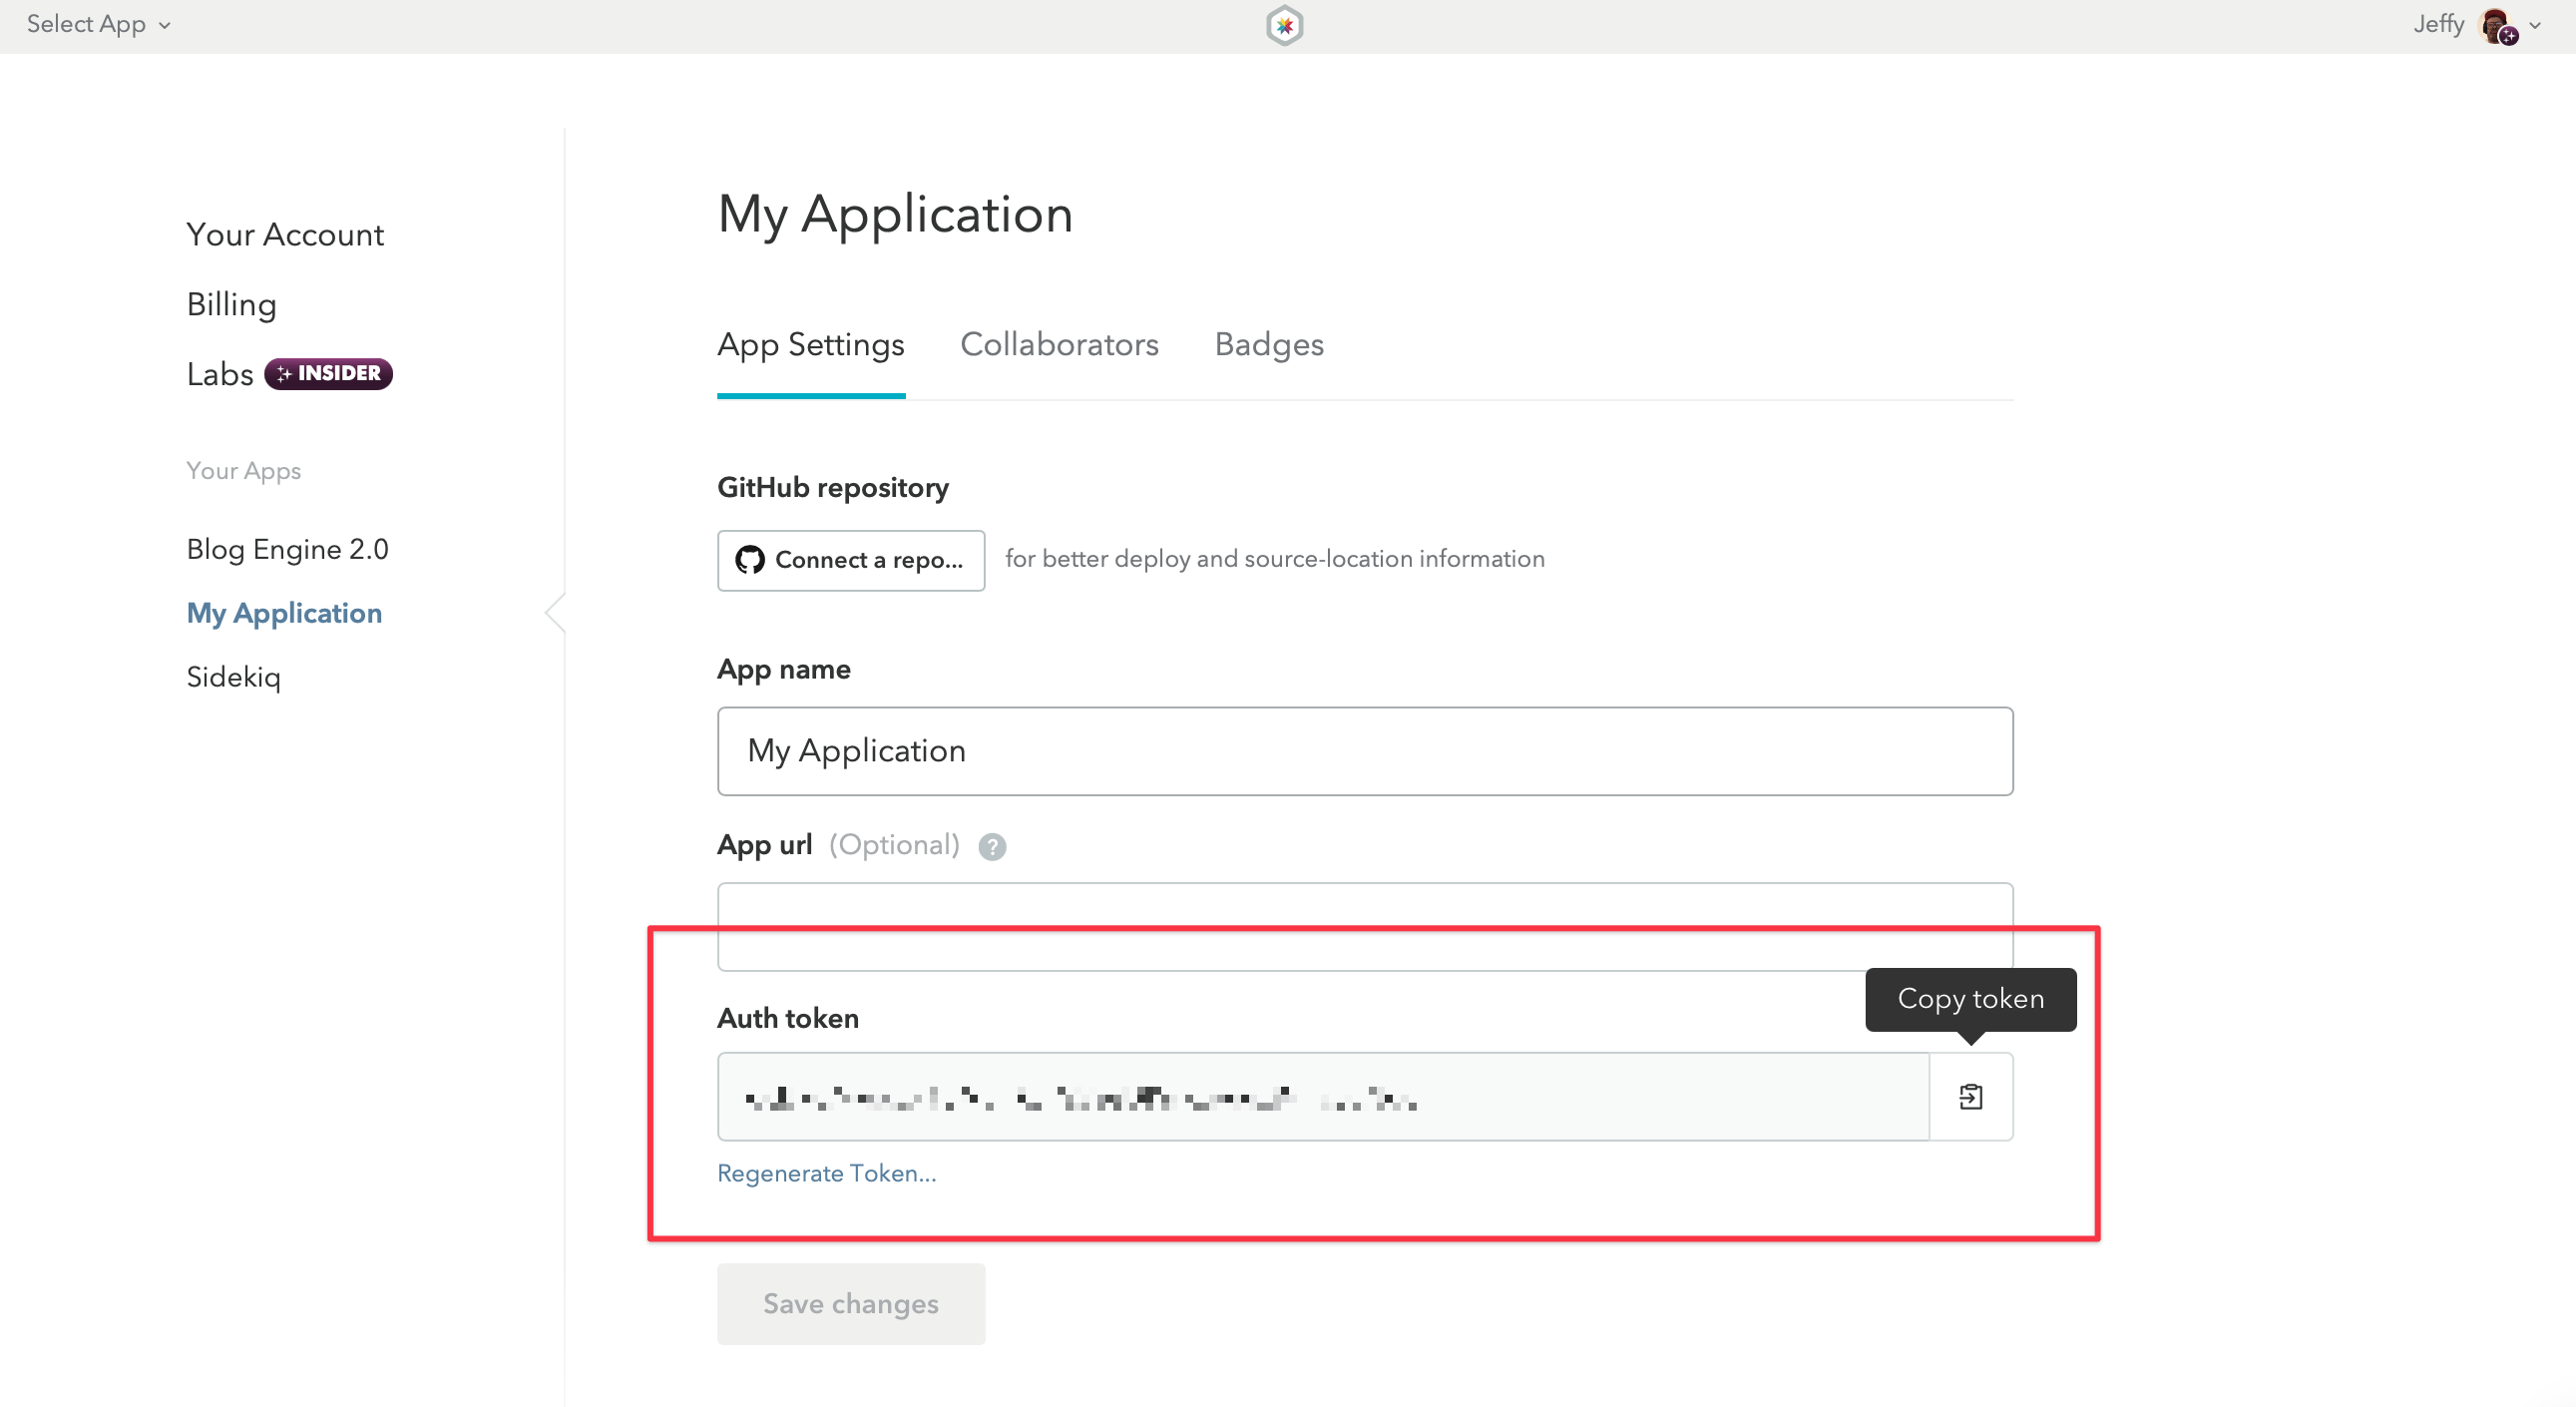
The authentication token is required when reporting data back to the Skylight service. You can find your authentication token on your app settings page under “Your Apps” or “Shared Apps.”
# config/skylight.yml

---
# The authentication token for the application.
authentication: <authentication token>
Or set the SKYLIGHT_AUTHENTICATION environment variable.
Ignoring Heartbeat/Health Check Endpoints
Sometimes, an endpoint exists solely for your load-balancer to determine whether your Rails process is up. If you would like to ignore this endpoint, you can set the ignored heartbeat/health check endpoint as follows:
# config/skylight.yml
ignored_endpoints:
  - HeartbeatController#status
  - StatusWorker
Once configured, Skylight will not collect instrumentation and requests to this endpoint will not be counted in the application’s usage or be represented as part of the application’s aggregated response time and RPM graphs.
The name of the endpoint can be found in the endpoints list on your Skylight application dashboard. For Rails actions, it will be ControllerName#action. For workers, it will be WorkerName. For Sinatra it will be VERB path, and for Grape it will be Module [VERB] path. You can find the name in the Skylight endpoints list if you’re unsure.
Alternatively, you may add the SKYLIGHT_IGNORED_ENDPOINTS environment variable. For example:
SKYLIGHT_IGNORED_ENDPOINTS=HeartbeatController#status,StatusWorker
You can not add an endpoint name using a wildcard like ControllerName#*. We generally discourage folks from ignoring any endpoints that are not heartbeat/health check endpoints, as it can reduce the usefulness of Skylight. If you don’t think an endpoint is going to be a problem, but then you ignore it, you won’t know that it’s causing an issue until it’s too late!
Log File
To change the location of the Skylight log:
# config/skylight.yml
log_file: log/skylight.log
Or set the SKYLIGHT_LOG_FILE environment variable. By default the log can be found at log/skylight.log with Rails or STDOUT otherwise.
Daemon Socket Path
The path where the socket file for the daemon is created. In general you will not need to change this. However, if you’re using an NFS mount (say with Vagrant) you’ll need to point this to a non-NFS location.
# config/skylight.yml
# Path to store daemon-related temporary files
daemon.sockdir_path: /var/run/myapp
Deploy Tracking
Skylight’s deploy tracking feature allows you to see your deployments marked on the Response Timeline
If You Deploy a Git Repository
If you deploy a git repository, deploy tracking should Just Work™ (not actually trademarked). You can, however, override the default deploy id, git sha, and deploy descriptions with configuration variables as shown below.
If You Use Heroku
You may need to enable Heroku’s Dyno Metadata feature in order to send deploy information to Skylight.
Manual Configuration
If you don’t deploy a git repo (e.g. you use a script that copies your files onto a server or a non-git VCS), deploy tracking will not be automated. Instead, you’ll need to manually configure Skylight to track your deployments:
# config/skylight.yml
deploy:
  # Set an id and/or a sha. If no id is provided, the sha will be used.
  id: <%= some_code_that_returns_a_unique_id %>
  git_sha: <%= some_code_that_returns_the_sha %>
  # The deploy description is optional.
  description: <%= some_code_that_returns_a_description %>
![]()
Alternatively, you can set SKYLIGHT_DEPLOY_ID, SKYLIGHT_DEPLOY_GIT_SHA, and SKYLIGHT_DEPLOY_DESCRIPTION as environment variables.
IMPORTANT:
If you override one of these variables, our server will assume they are all overridden. For example, if you deploy with Heroku and override your deploy descriptions, you’ll also need to override the deploy id and/or sha.
GitHub integration
If you connect your app to GitHub and provide a valid git sha, you can leave the description blank. We’ll get it for you from GitHub!
Additionally, connecting your app to GitHub allows us to link to the GitHub commit associated with the deploy.
Setting Up Multiple Environments
By default, the Skylight agent only enables itself in the “production” environment. See the Environments page to learn how to enable Skylight in other environments.
Rails
There are additional configuration options that can be set in the Rails environment.
IMPORTANT:
Unless otherwise noted, these settings should be added to config/application.rb. Do not attempt to set them via initializers as Skylight starts before initializers are run.
Skylight performs setup when the gem is required, at which time Rails will be detected and tapped into. However, you may find you have to manually require skylight/railtie if you need to load the Skylight gem before Rails.
Logger
Perhaps you might want to tell Skylight to use a specific logger. This can be achieved like this:
# config/application.rb
config.skylight.logger = Logger.new(STDOUT)
Probes
In order to instrument other libraries outside of Rails, the agent includes probes which are only activated if the related files are required. For a full list of probes see our Available Instrumentation Options. You may also want to learn more about how probes work.
You can add additional probes in your Rails config:
# config/application.rb
config.skylight.probes += %w(excon redis active_model_serializers)
In the event that you want to disable a probe that is on by default, you can also remove it from the list:
# config/application.rb
config.skylight.probes -= ['middleware']
Middleware Stack
By default, Skylight is positioned at the top of the middleware stack. You can check Skylight’s position in the middleware stack by running rake middleware. In the unlikely event that you need to change this, you can require Skylight in a specific location in the middleware stack:
# config/application.rb

# To give Skylight a specific index:
config.skylight.middleware_position = 0 # default

# To position Skylight after a specific middleware:
config.skylight.middleware_position = { after: MiddlewareName }

# To position Skylight before a specific middleware:
config.skylight.middleware_position = { before: MiddlewareName }
Sinatra
In Rails
If your Sinatra app is mounted in Rails, all you have to do is require the correct probes:
# config/application.rb
config.skylight.probes += %w(sinatra tilt sequel)
See the Rails configuration instructions for more information.
Standalone
Skylight works just as well in standalone Sinatra apps, though the instructions are just a touch more involved.
Sinatra apps usually do not require all gems in the Gemfile, so you will want to explicitly require Skylight. You will also need to boot up the Skylight agent explicitly. You generally do not want to run Skylight in development mode, so you will want to specify its use in the :production environment:
configure :production do
  require "skylight/sinatra"
  Skylight.start!(file: PATH_TO_CONFIG)
end
PATH_TO_CONFIG should point to your config/skylight.yml file.
Alternatively, if you are setting your configuration using ENV variables, you can call Skylight.start! without arguments.
You don’t need to install any middleware manually, or do anything with unicorn forking settings.
To use Skylight’s probes, you will need to require them individually:
Skylight.probe(PROBE_NAME)
Note:
Padrino is not currently supported as it differs from base Sinatra in some significant ways. We are investigating adding support in future releases.
If your Sinatra app is mounted in another Rack app, and you would like to include that app’s path prefix in your Sinatra endpoint name, set SKYLIGHT_SINATRA_ROUTE_PREFIXES=true in your env or sinatra_route_prefixes: true in your skylight.yml file (for the curious, this will prepend the value of SCRIPT_NAME to your Sinatra app’s endpoint name). (Requires Skylight >= 4.2.0)
Grape
On Rails
If your Grape app is mounted in Rails, it works out of the box with no further configuration! Congrats!
See the Rails configuration instructions for more information.
On Sinatra
If your Grape app is mounted in a Sinatra app, just follow the Sinatra instructions.
Standalone
Grape apps usually do not require all gems in the Gemfile, so you will want to explicitly require Skylight. You will also need to boot up the Skylight agent explicitly.
require "skylight"
Skylight.start!(file: PATH_TO_CONFIG)
PATH_TO_CONFIG should point to your config/skylight.yml file.
Alternatively, if you are setting your configuration using ENV variables, you can call Skylight.start! without arguments.
Finally, you’ll want to install the Skylight middleware in your base Grape or Rack app with:
use Skylight::Middleware
To use Skylight’s probes, you will need to require them individually:
Skylight.probe(PROBE_NAME)
IMPORTANT:
Since you probably don’t want to instrument your app locally, you should set up conditionals to ensure that Skylight is only run in production environments.
Regenerating the App Token
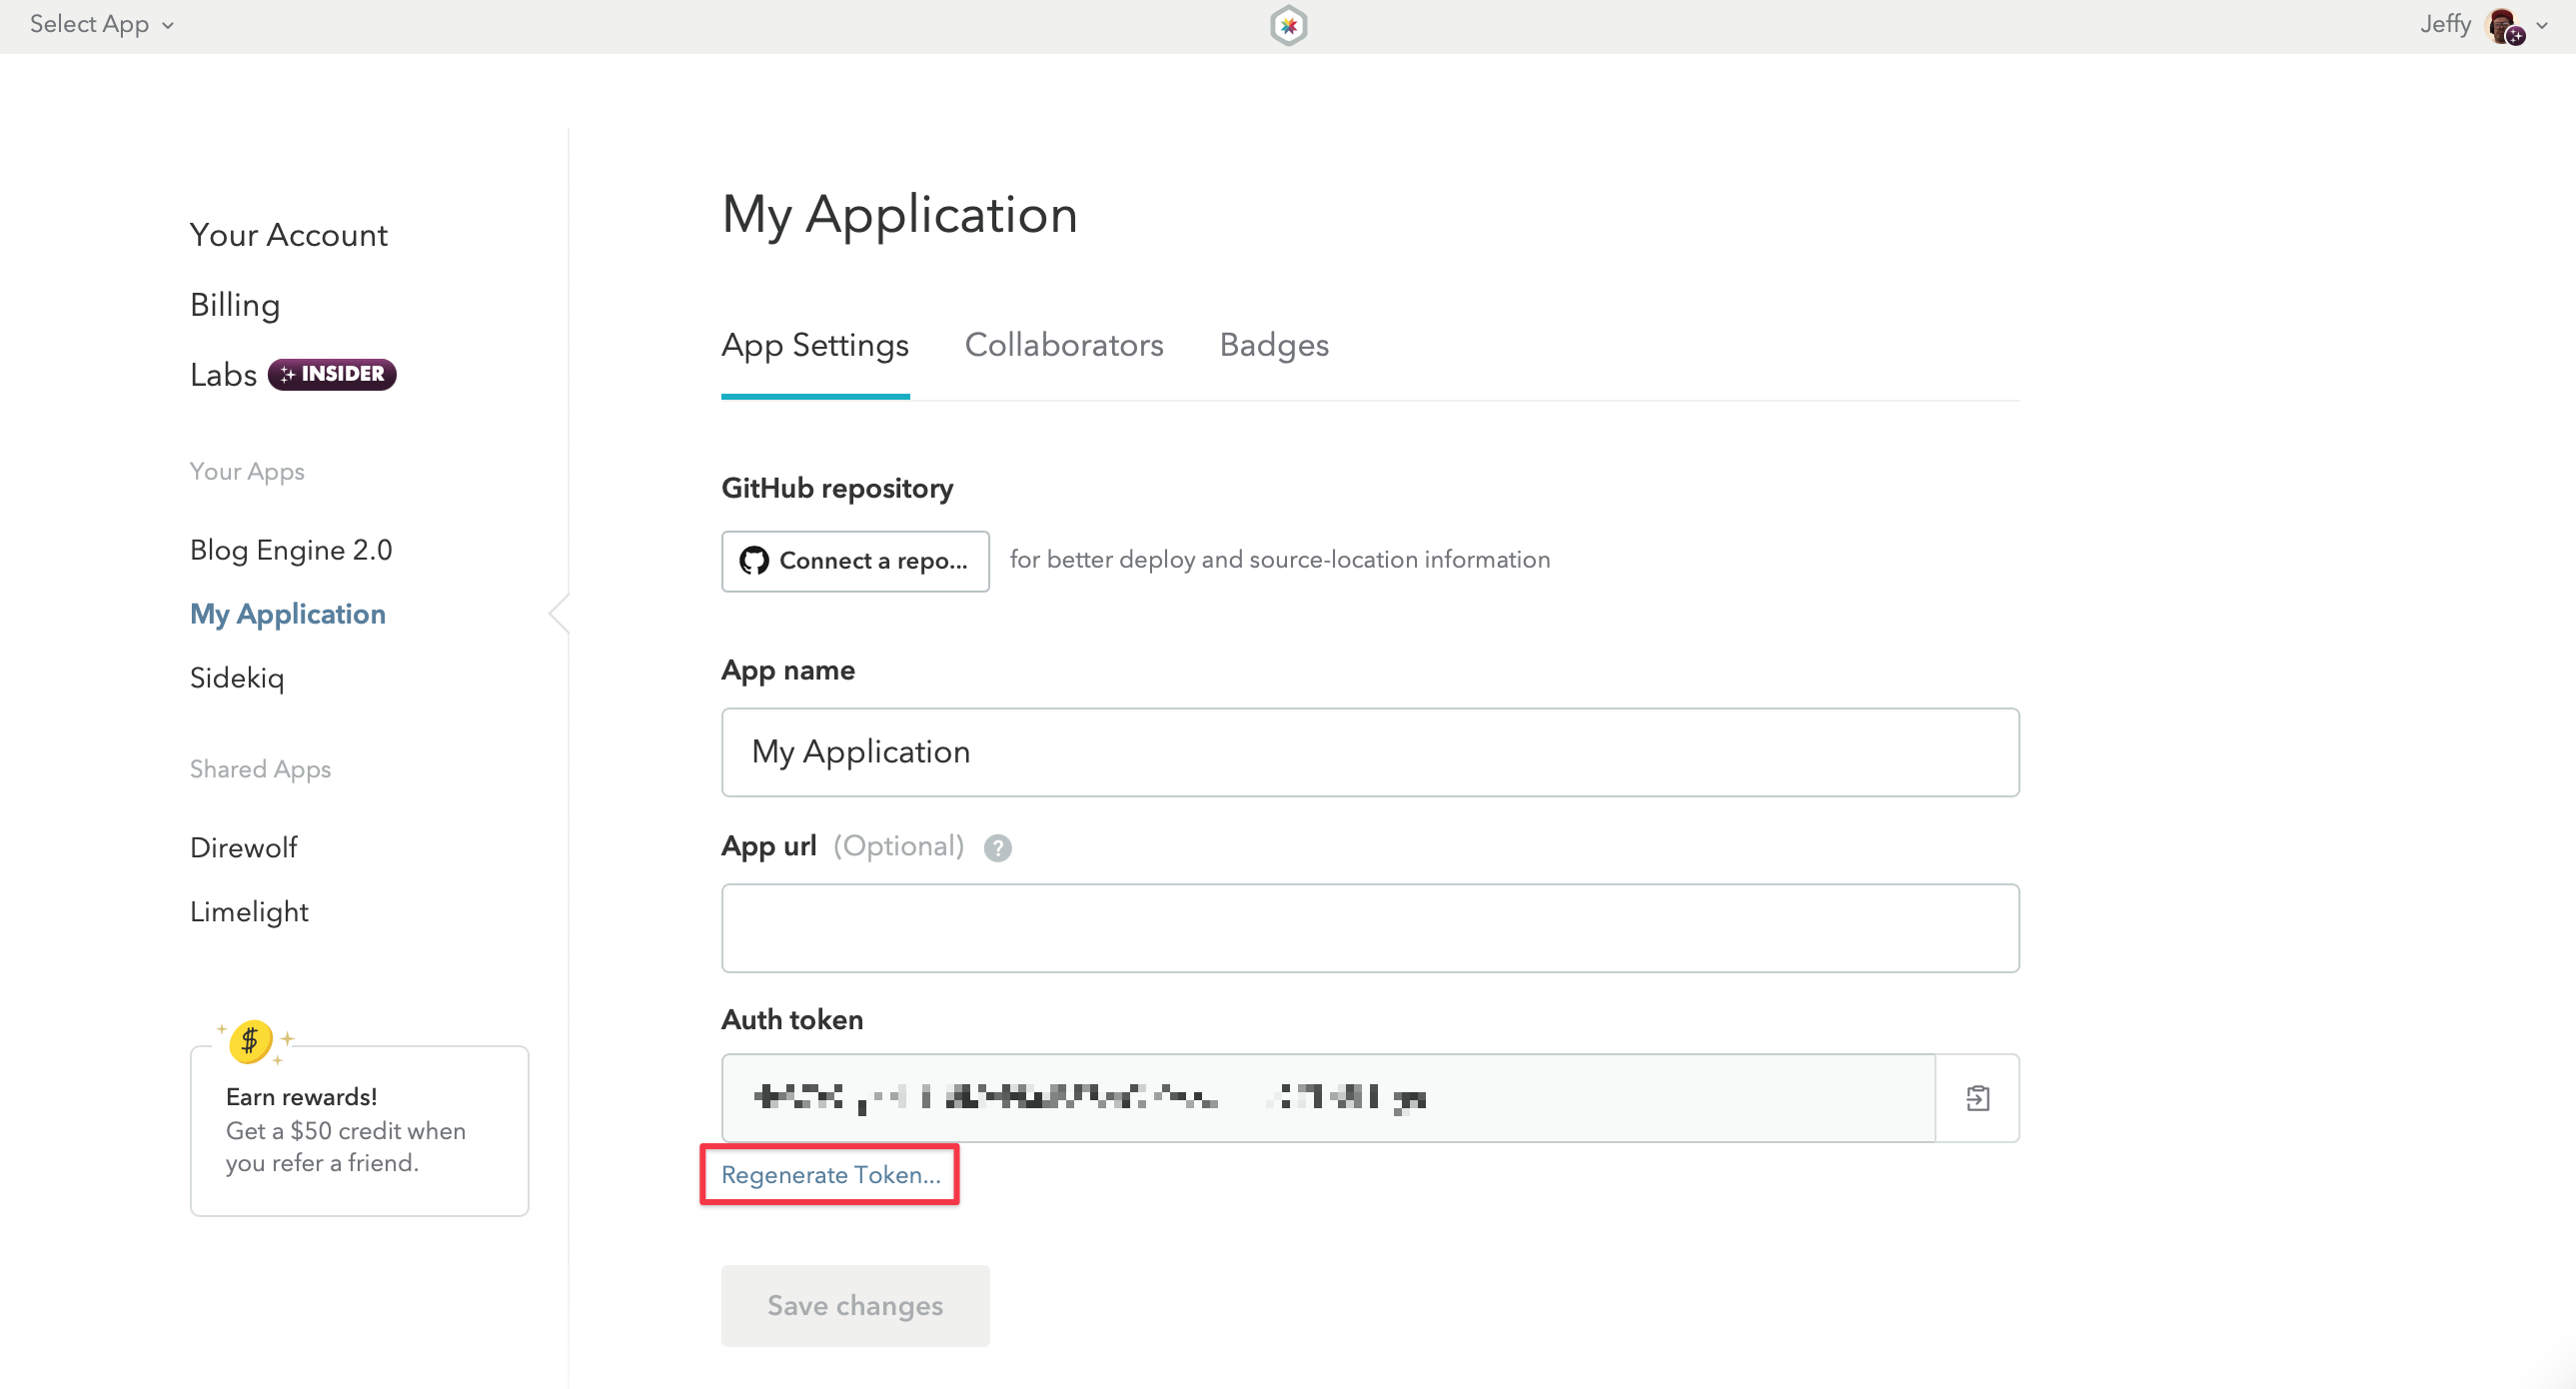
If your application token may have been compromised, you can regenerate it from the settings page, then navigate to the settings for your app.

Once you have regenerated the token, you will need to update your production application with the new token.
Manual App Creation
In some cases, you might need to set up an app on Skylight manually, (e.g. to use the Phoenix agent). Manual app creation is a way of setting up an app in Skylight without having to run bundle exec skylight setup <setup token>.
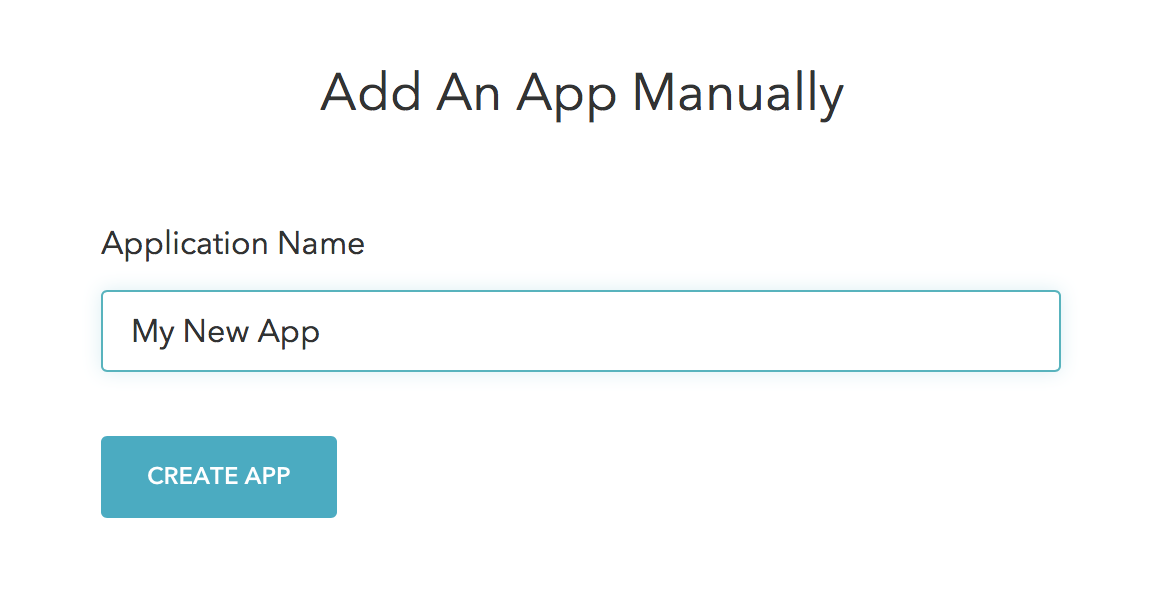
Navigate to your app setup screen, and click the “Or create the application manually.” link towards the bottom of the page. Then, you’ll be able to type in the name of your new app.

Once the Skylight app is created, you’ll be redirected to the app settings page, where you can retrieve the authentication token for your application.

Next, you’ll need to set your set your authentication token.
Finally, deploy your application. After deploying, be sure to check your Skylight dashboard; you should begin seeing request data appear shortly!